Difference between revisions of "Updating Translation Files to Latest Version"
Jump to navigation
Jump to search
| Line 21: | Line 21: | ||
| − | * Viola! You have now updated your Translation file to the latest version. What this means is now you will see the following in your Translation file | + | * Viola! You have now updated your Translation file to the latest version. What this means is now you will see the following in your Translation file: |
| − | ** Newly added key values (marked with the following symbol [@]) | + | ** Newly added key values (marked with the following symbol [@]). |
| − | ** Key values that had a change in their value (marked with the following symbol [@], and also with your translated value below in the 'oldValue' field) | + | ** Key values that had a change in their value (marked with the following symbol [@], and also with your translated value below in the 'oldValue' field). |
| + | * The intended workflow is to open the updated Translation file, and search for the following symbol [@]. Then anywhere you see it, indicates there was an addition or an updated value, and you can easily alter it. (refer to figure 5). | ||
[[File:creator_updating_2.jpg|800px|frame|none|border|figure 5]] | [[File:creator_updating_2.jpg|800px|frame|none|border|figure 5]] | ||
| − | |||
| − | |||
=== Uploading your updated Translation file to the Steam Workshop === | === Uploading your updated Translation file to the Steam Workshop === | ||
| − | If you have not previously uploaded your Translation file to the Steam Workshop, refer to [[Uploading_Translation_Files|Uploading Translation Files]]. | + | If you '''have not''' previously uploaded your Translation file to the Steam Workshop, refer to [[Uploading_Translation_Files|Uploading Translation Files]]. |
| − | ''' | + | If you '''have''' previously uploaded your Translation file to the Steam workshop: |
* Launch HellSign. | * Launch HellSign. | ||
* Go to the Local Translations window and select “Workshop Upload” (figure 6). | * Go to the Local Translations window and select “Workshop Upload” (figure 6). | ||
Revision as of 17:00, 2 April 2019
Updating Translation File to Latest Version
Follow the steps below to update your Translation file to the latest version (note, this is not destructive, and also creates a backup for you if anything goes wrong. With this said, it could hurt to backup your Translation file before updating).
Updating the actual Translation File
- Lanch HellSign.
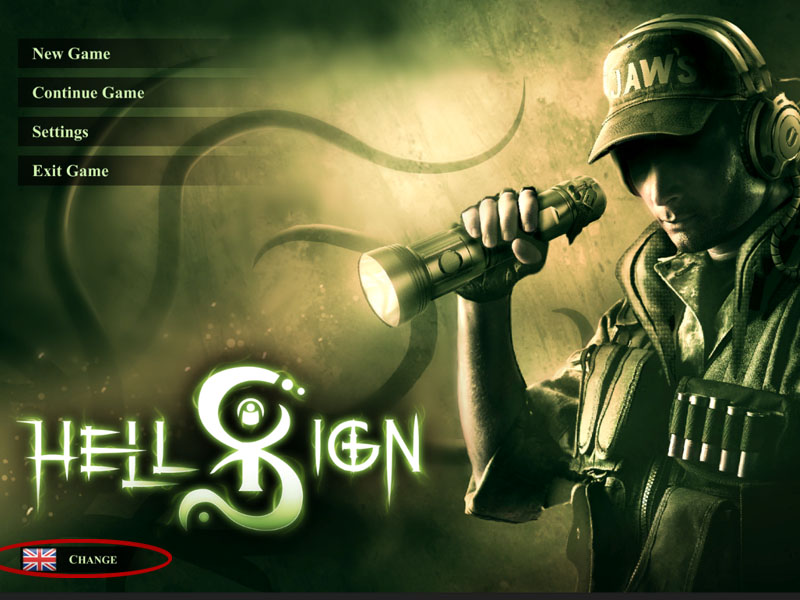
- In main menu screen you will see a language selector at the bottom left (figure 1), click this selector.

figure 1
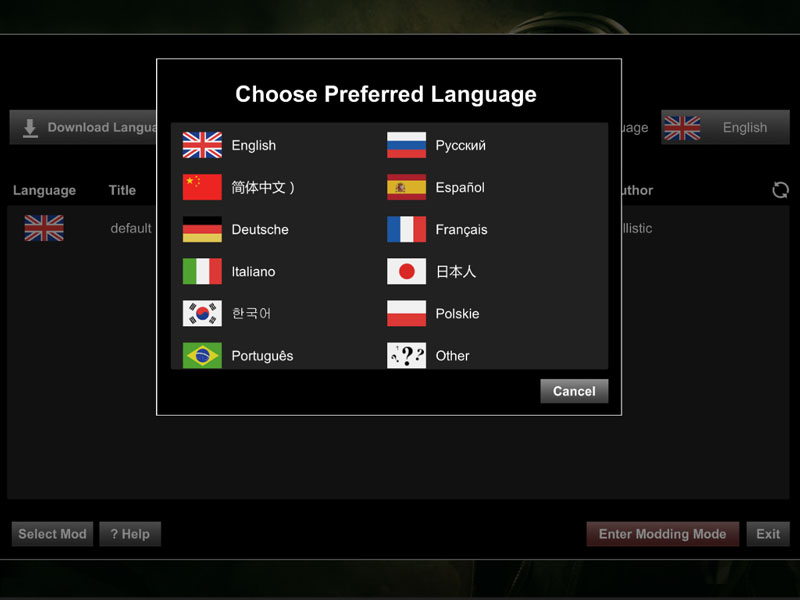
- A window will popup prompting you to select your desired language (figure 2), click the language you want the game to appear in (English in this demo).

figure 2
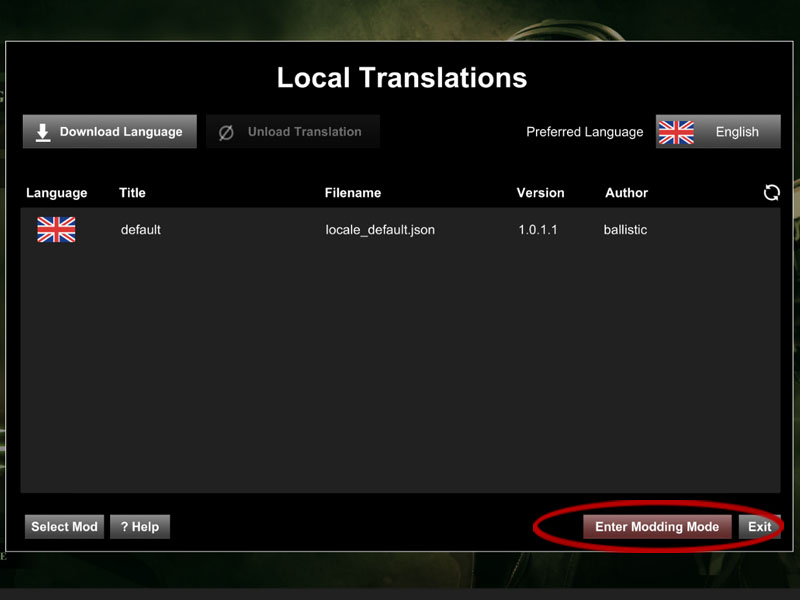
- Click the “Enter Modding Mode” button (figure 3).

figure 3
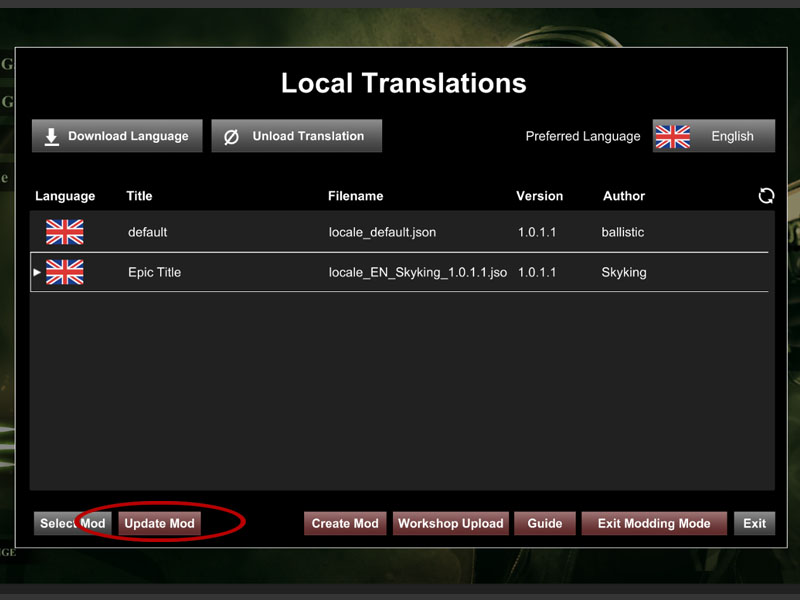
- Select the Translation file that you want to update, and click the “Update Mod” button (figure 4)

figure 4
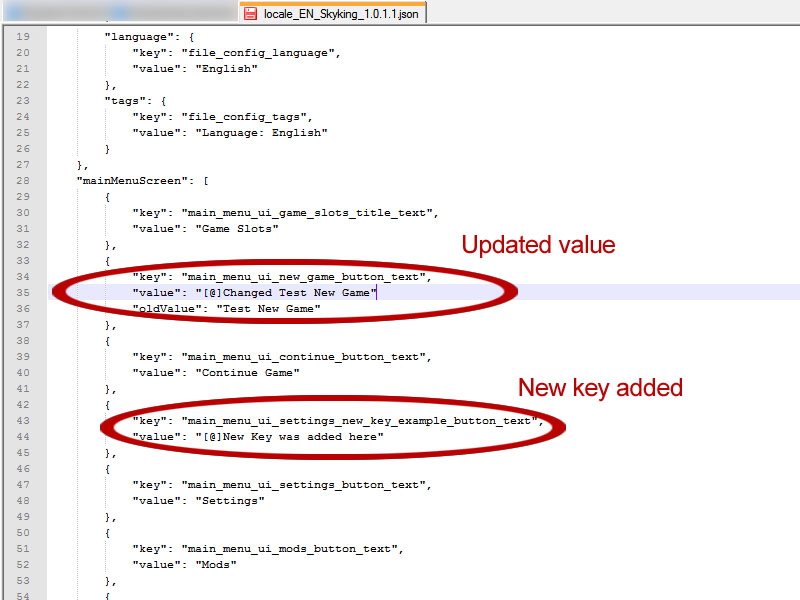
- Viola! You have now updated your Translation file to the latest version. What this means is now you will see the following in your Translation file:
- Newly added key values (marked with the following symbol [@]).
- Key values that had a change in their value (marked with the following symbol [@], and also with your translated value below in the 'oldValue' field).
- The intended workflow is to open the updated Translation file, and search for the following symbol [@]. Then anywhere you see it, indicates there was an addition or an updated value, and you can easily alter it. (refer to figure 5).

figure 5
Uploading your updated Translation file to the Steam Workshop
If you have not previously uploaded your Translation file to the Steam Workshop, refer to Uploading Translation Files.
If you have previously uploaded your Translation file to the Steam workshop:
- Launch HellSign.
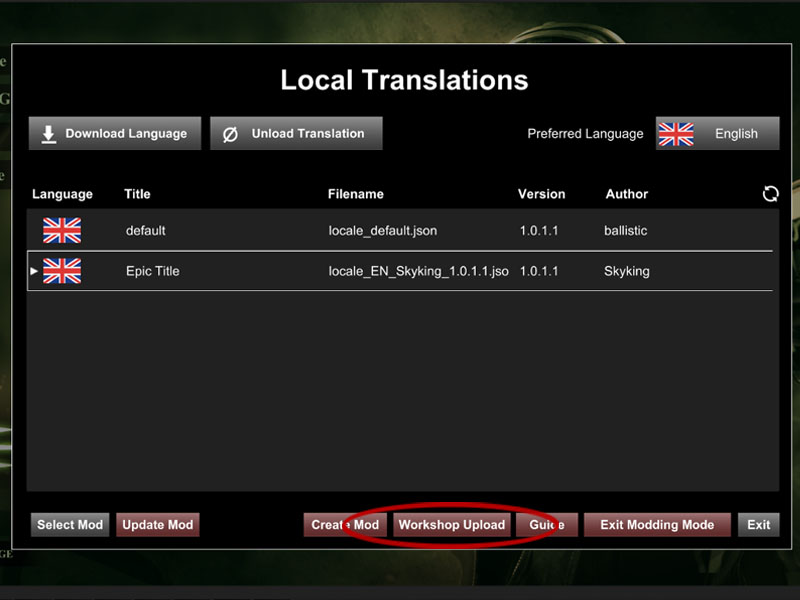
- Go to the Local Translations window and select “Workshop Upload” (figure 6).

figure 6
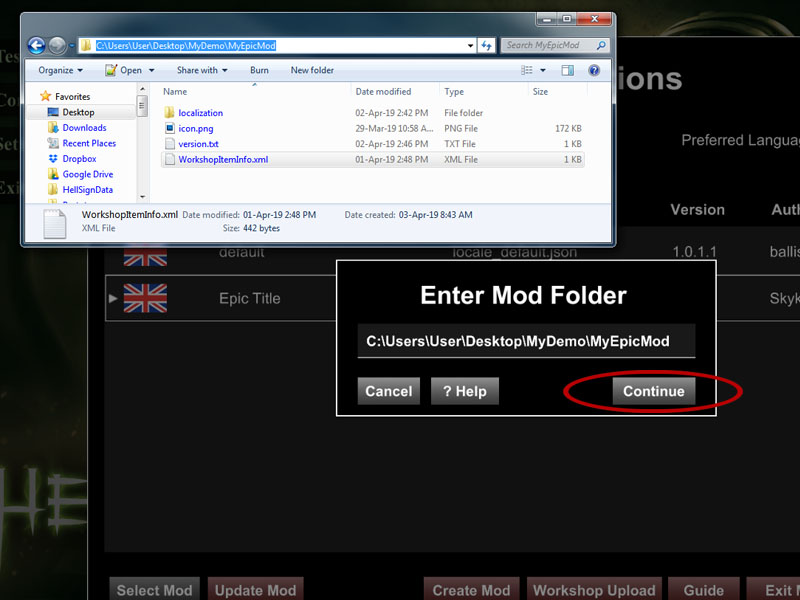
- Copy the root path for the folder you created when you originally uploaded the Translation file to the Steam Workshop, and paste it into the “Enter Mod Folder” window, then click “Continue” (figure 7). (note, you should see a file in the root called 'WorkshopItemInfo.xml')

figure 7
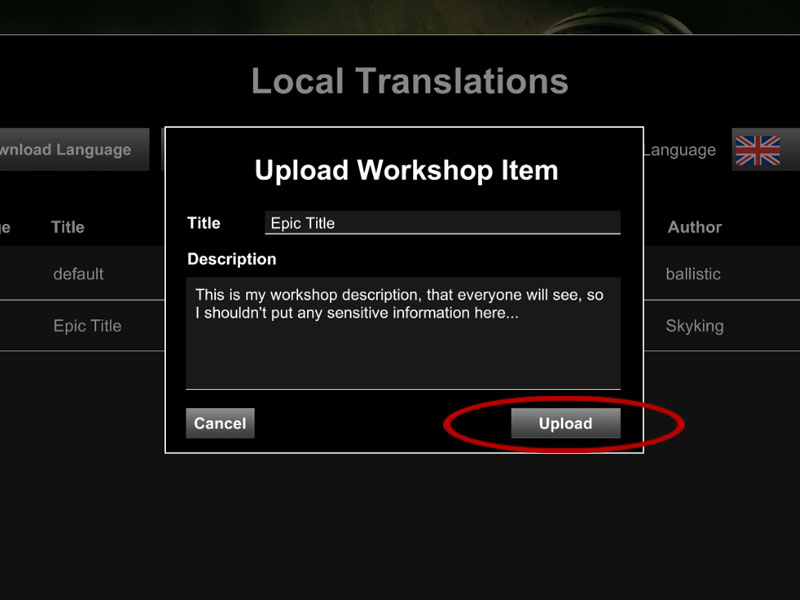
- The Title and Description will automatically populate, but you can change them if you like. When you are ready, click “Upload” (figure 8).

figure 8
Note, assuming the upload was successful, it may take some time for your new item to appear in the workshop, so be patient.
Back to Creator Guide