Difference between revisions of "Creating Translation Files"
Jump to navigation
Jump to search
| Line 3: | Line 3: | ||
Follow the steps below to create your own Translation files. | Follow the steps below to create your own Translation files. | ||
| − | * | + | * Launch HellSign. |
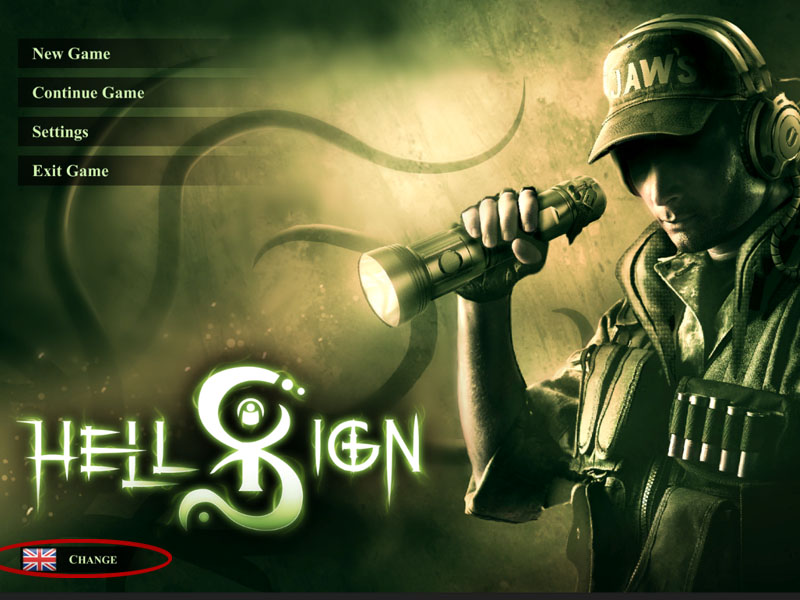
* In main menu screen you will see a language selector at the bottom left (figure 1), click this selector. | * In main menu screen you will see a language selector at the bottom left (figure 1), click this selector. | ||
[[File:user_fig_1.jpg|800px|frame|none|border|figure 1]] | [[File:user_fig_1.jpg|800px|frame|none|border|figure 1]] | ||
Revision as of 16:15, 3 April 2019
Creating Translation Files
Follow the steps below to create your own Translation files.
- Launch HellSign.
- In main menu screen you will see a language selector at the bottom left (figure 1), click this selector.
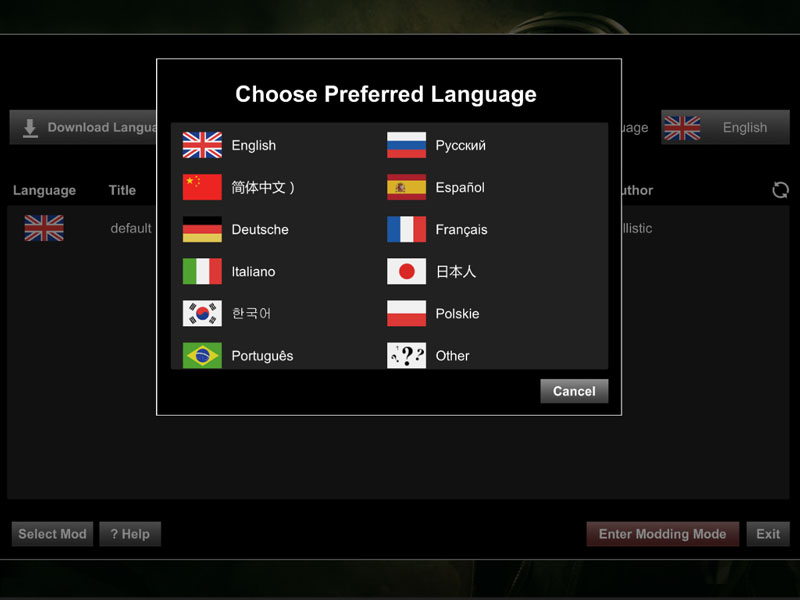
- A window will popup prompting you to select your desired language (figure 2), click the language you want the game to appear in (English in this demo).
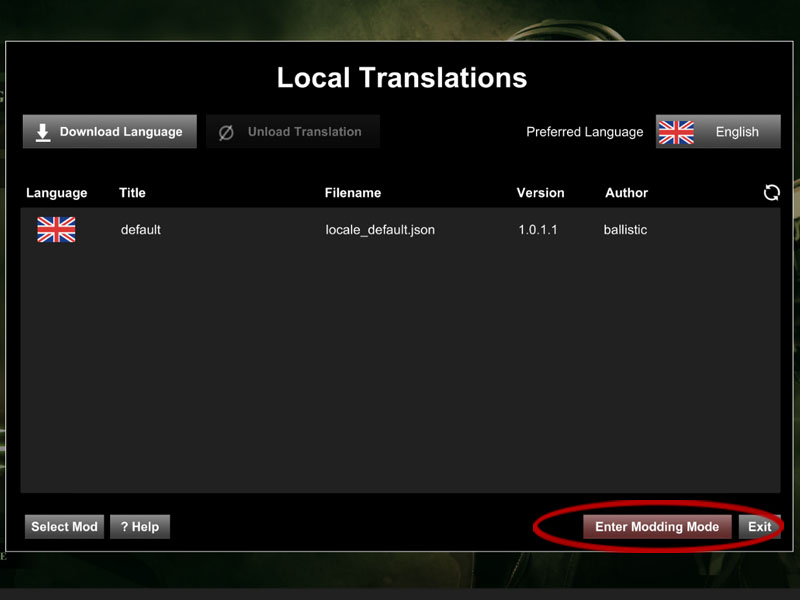
- Click the “Enter Modding Mode” button (figure 3).
- Click the “Create Mod” button (figure 4)
- Enter a title and author, and select the language for your mod, then click “Create Mod” (figure 5).
- You should now see your newly created translation file in the list of 'Local Translations' (figure 6).
Continue to Working with Translation Files
Back to Creator Guide


